Back View fig B
- 1. Bust: Place tape measure over fullest part of bust, higher in back, as indicated in figures A and B.
- 2. Waist: Place tape measure around body at smallest part of figure.
- 3. Hip: Place tape measure around hips 8 inches below waistline – do not allow tape measure to slip up or down.
- 4. Neck: Place tape measure around, as indicated in figures A and B.
- 7. Width of back: Take this measurement across back 5 inches below neck. See figure B.
- 10A to 10B. Length over left hip to floor: Take this measurement from natural waistline to floor – from 10A to 10B. figure B.
- 11A to 11B. Full centre-back length to floor: Take this measurement from centre of neck in back to floor – from 11A to 11B, figure B.
- 11A to 11C. Back length from neck to natural waistline.
- 14 to 15. Top arm length from shoulder to bend of elbow. (Bend arm and touch lobe of ear as in figure B)
- 15 to 16. Arm length from elbow to wrist.
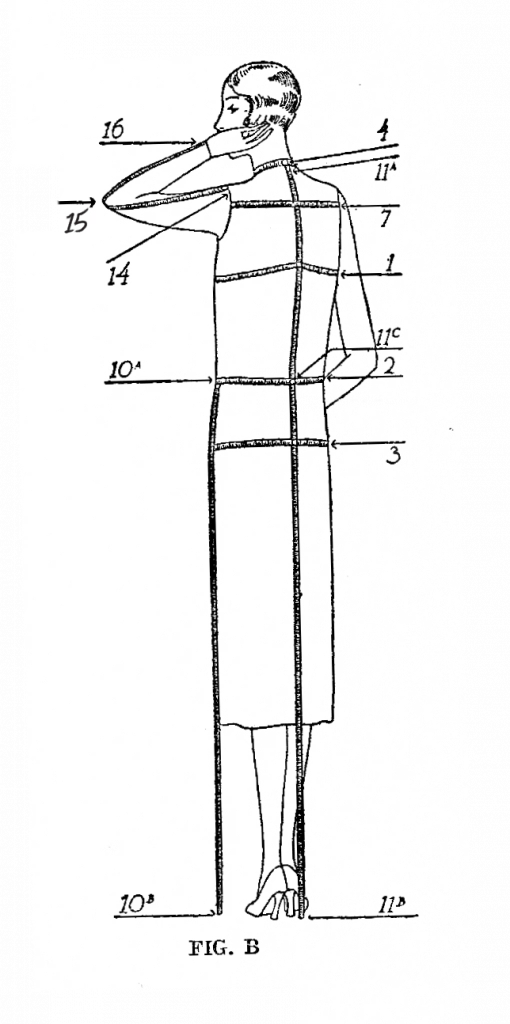
Back View Measurements: In regards to the bust measurement (1) , I was taught always to place a finger under the tape when measuring the bust – raising the tape at back most likely creates the same result. The neck measure (4) is a necessity for high neck bodices and any structural necklines/collars. I would always take this measurement. (11) is important for getting the length of pieces correct, you will have a lot less work if you check these measurements before cutting your pieces. The arm measurements (14-16) are necessary for making sure your skinny sleeve is functional.